Psst.. I'm spilling my best secret to photographing kids..

All of my beach photography sessions lately have got me thinking and pushing my own boundaries.  It occurred to me that I have a legit secret to photographing kids that might help you take pictures of your own kids that will make you swoon.

Here it is, my secret to photographing children, especially on the beach or in the backyard in the summertime or playing in their bedroom any day of the week. 

It’s pretty simple:  Don’t try. 

Say what?!  I know, to all of the overachievers out there (myself included) that sounds like absolute blasphemy.  But I swear to you, when I am not trying to make it all perfect, when I can let go and let my gut lead the way, when I am not preoccupied with capturing the perfect photograph, that’s when the magic happens.

So, this is my one-stop advice column for photographing your kids this summer.

Don’t try so hard.

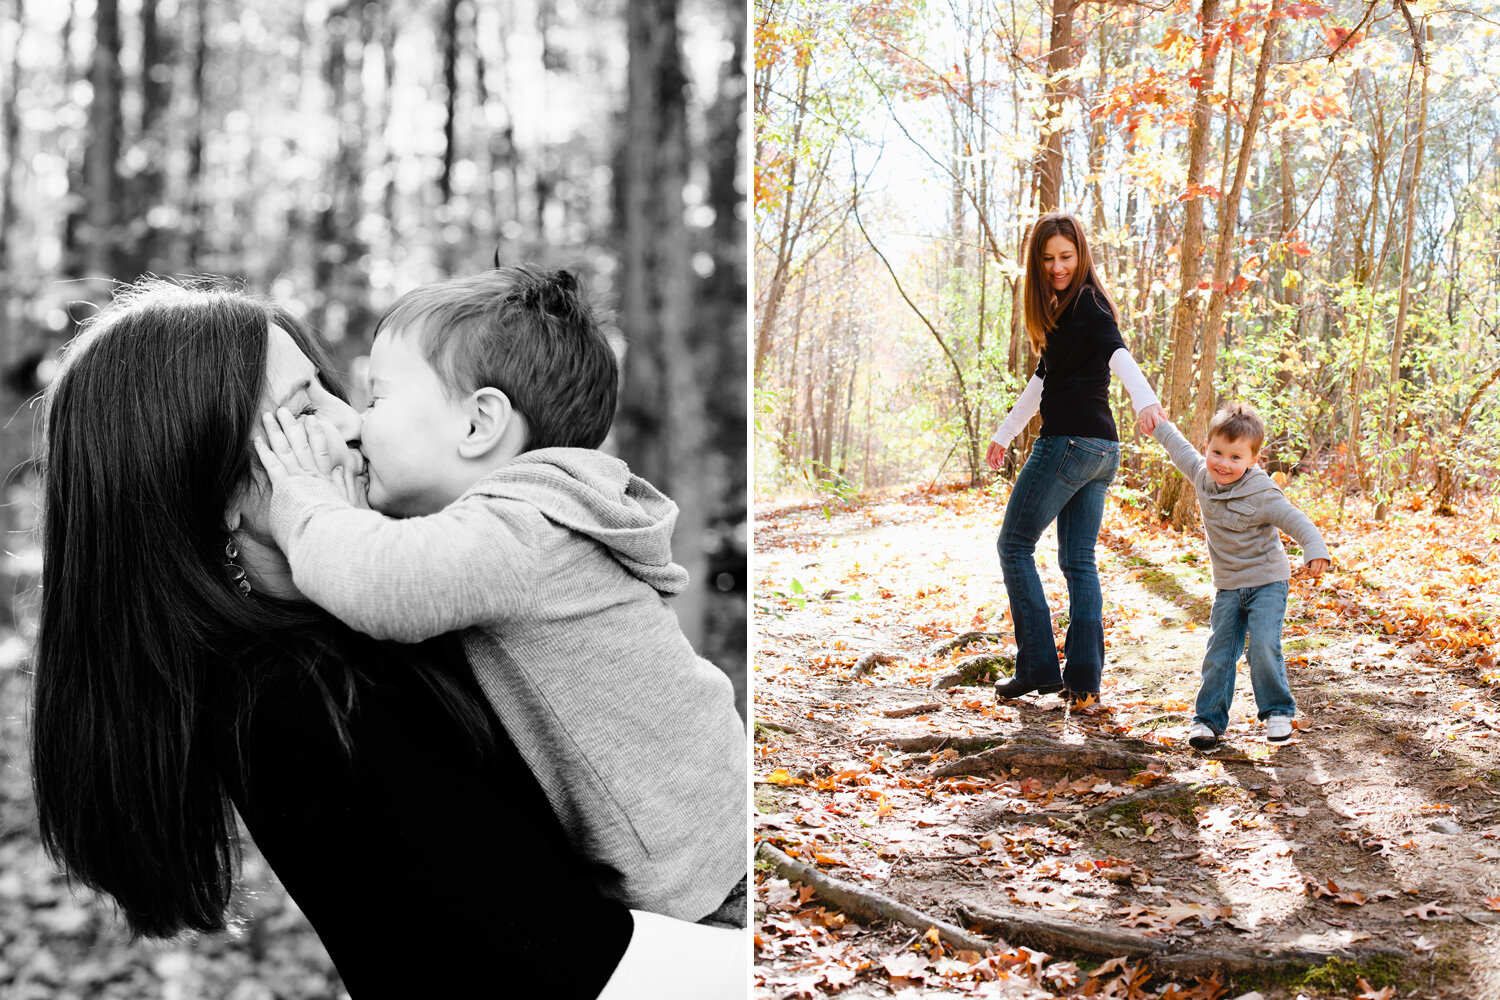
Observe them.  What are they doing right now that you wish you could bottle right up?  Let them do that.  Try to refrain from interfering.   Be a fly on the wall.  Be patient.  Blend into the background and anticipate those quirky, thoughtful, lovable moments.

And just let it happen.  Let go of perfection: the perfect light, the perfect composition, the perfect smile, the perfect Pinterest boards.  Just shoot pictures from the heart and I promise you, in 15 years, you’ll be so happy you have these photos of your kids being exactly who they are today.

Here's a few favorite photographs from 2 beach sessions this month.  Many break the rules with composition and lighting, but sometimes the moment and the expressions are all that matter.  

Stony Lake / Lake Michigan:

kids bike photograph
lake michigan kids photography

Malibu, California:

malibu kids beach photography
malibu beach dance photograph

Oh, and the best part is that when kids are in their happy place, sometimes they’ll just look up at you with the best smile or glance and you might still get those perfect beach portraits...

Without even trying.

malibu children's portrait
malibu beach portrait

How to Photograph People while Traveling (meaningfully)

Travel portraits allow us to connect and tell stories about the places we visit.  In our fast-paced, digital age, it is so easy to take a snapshot and upload it to our favorite social media outlets, all while briskly walking by.  If we can make an interesting photograph without actually looking up, what happens when we stop to share a few words, look closer, and make a true connection?

Bali_2011_737-2_web.jpg

If you have a trip in the books or simply have a love for travel, there's a really good chance you'll snap a shot or two of a stranger now and then.  How does it feel?  I know, it can be a vulnerable experience for both photographer and subject, but it doesn't have to be.  

I hope the following tips might help you not only take more meaningful travel portraits, but also connect and honor the people you meet along the way.  

Photographs tell stories, but the act of making them, whether on an iPhone or Canon 5d Mark III, can add depth to our experience.


1)  Make a Genuine Connection  (Learn the local language and smile.)  :)

While preparing for your trip, take a few extra minutes every day and study the local language.  Learn a few key phrases and local slang.  This delights locals and shows respect.

I will never forget our very first day in Bali when our driver, Gustaaf, was a wee bit late (an hour or two).  When he finally arrived full of apology, I quickly responded with “Sampunang sangsaya!”  (Essentially, “no worries” in the local Baliness dialect.)  He was delightfully surprised and this allowed our first exchange to be one of laughter, smiles, and mutual respect, despite the late start.

Whenever possible, it was my goal to communicate with locals in Indonesian or Baliness.  Their delight and warm smiles in return never grew stale and this connection allowed me to create beautiful portraits, beyond typical travel snapshots.

Portraits taken in Bali, Indonesia

Portraits taken in Bali, Indonesia

Photograph taken in Bali, Indonesia 

Photograph taken in Bali, Indonesia 

Portraits taken in Bali, Indonesia

Portraits taken in Bali, Indonesia

To keep it real:  

It’s not always so easy.  In the small fishing town of Hopkins, Belize, even though there was no language barrier, I found making portraits of the locals much more challenging than in Bali. 

However, the same lessons were revealed.  Approach someone with a smile, compliment them, show respect, and ask politely to take their photograph. Many people in Belize, mostly men, declined.  As a photographer who is visualizing a killer shot, it is hard to walk away, but it is more important to show the upmost respect. 


2)  Zoom with your Feet (Change your vantage point and work quickly!)

Once you’ve made a genuine connection and you have your subject’s permission, “zoom” by moving your feet, rather than just the focal length of your lens.  Think about how it feels when someone points a camera at you – perhaps you are a closet supermodel, but I assume most us get a little sweaty palm action as the self-consciousness creeps in.   

Therefore, for the following series of images, I began by kindly approaching this lovely woman as she washed her dishes.  Realizing I was stepping into a stranger’s personal space, with immense respect, I complimented her on the color of her beautiful home, her adorable kids, and how the light was just perfect. 

When she obliged to my request to take a few photographs, I started by stepping back to document the entire scene with a wide vantage point.  Then, I moved in closer for a full-length photo of her daughter, as I sensed she was open to my camera.  Finally, as I interacted and sensed her comfort, I took a close-up portrait, which fit my original vision.  As a token of gratitude, I showered her with compliments as I showed her the images I had captured.

Know your camera, be quick, and continue to connect with a smile as you shoot.  This intentional approach not only allows your subject to ease into having their portrait taken, but it also gives you a diverse collection of images from a variety of vantage points. 

Photograph taken in Hopkins, Belize

Photograph taken in Hopkins, Belize

Portraits taken in Hopkins, Belize

Portraits taken in Hopkins, Belize

3)  Look Close and Move beyond Portraits (Capture details to tell a story.)

Environmental portraits tell a story about a person by incorporating their surroundings.  When I took these photographs of Caitlin, a local to Hopkins, Belize who is originally from Ohio, I dug deeper by documenting her quaint bakery off the beaten path and the subtle details within.

Caitlin is full of life, inspiration, and spirituality and shares it openly.  She works tirelessly to support her family with her bakery and her devotion to both is apparent through the spark in her eyes and the tiniest details of her environment.  I was intrigued by her story and found the more I photographed, the more I learned, simply by slowing down and looking closely.

Caitlin's Bakery in Hopkins, Belize

Caitlin's Bakery in Hopkins, Belize

Belize-4_web.jpg

(Caitlin also makes a mean chocolate zucchini muffin that I absolutely think you should go out of your way for if you find yourself in Hopkins, Belize.) 

Remember, to travel is to explore what is unfamiliar, and to photograph with openness is to connect unconditionally.  Always show respect, understanding, and gratitude and I promise you’ll make some pretty amazing photographs (and connect with some fascinating people) along the way. 

letting go of perfection // a “day in the life” photography session

Isn’t it fascinating how difficult it can be to let go… Letting go of perfection, expectations, and the pressures we place on ourselves is HARD.  Yet, it isn’t until we truly let go that we are able to see what is waiting to be revealed.  And often times, it is actually perfect... the kind of perfect we can’t expect or control.  It just happens.

It is not uncommon for me to prepare my clients in this way.  It has become a mantra for my work.  I truly believe that the best moments happen when we have fully let go of pressures and expectations.  Not only are children most at ease when adults are at ease, but my best photographs also happen when I am able to get lost in my surroundings without worry. 

As I prepared for this session, however, something was different.  My client didn’t need a lick of advice or preparation.  She gets it.  She wrote me candidly about her life’s potential changes to come and how meaningful it will be to capture some special everyday moments with her 3 year old son.  She told me how she loves the way they snuggle up in her bed first thing in the morning, the way they lie on their bellies… she expressed how they love to cook together and explore their favorite hiking trail. 

As we brainstormed ideas and planned our session, I quickly realized that I was battling my inner perfectionist.  I was worrying about not having enough light in the bedroom at 8:30am and ending up outdoors when the sun is so harsh.  But, perfection is not the goal, here.  Instead, my goal is to be fully present in order to capture true “day in the life” moments as they naturally unfold on this ordinary day, regardless of when and where the light will be “best.”  It didn’t take long for me to step back and take my own advice.  I needed to let go.

And the result – a perfection that I could not have predicted, planned, or pre-visualized.  So, maybe this 3 year old was in “bad guy” mode on this particular day... and maybe he put his shirt on backwards... and maybe he fought the getting ready routine, which resulted in sporting his bed-head hair for the rest of the day.  And maybe there was barely enough light in the bedroom and we ended up shooting outdoors at nearly high noon.  And maybe it didn’t matter.  We chose to not let it matter. 

In all of its imperfection; it was pretty perfect.  And that is typically how it goes.

photography wall arrangement ideas & inspiration

A seasonal change always seems to align with our natural inclination to change, as well. For me personally, it's been about getting back to yoga, purging the excess "stuff" from our home, and simply finding new cute, modern throw pillows to freshen our living space. This Fall, I also naturally have photography on the mind and I'm feeling inspired to shake up the ordinary. Perhaps, your living space is also aching for a change and you have been trying to figure out what to do with your photographs.. Here's some inspiration for doing just that:

Idea I: A Casual, 'Organized yet Random' Wall Arrangement (with no fuss..)

This approach is perfect for wall arrangements that you hope to add to or change over time. In this case my client combined a wide selection of special photographs, from the photos I captured from her engagement session and wedding portraits/reception to their trip to Italy and their destination wedding/honeymoon in St. Lucia. I love that this wall arrangement is a focal point in their living space and celebrates their life before this little bugger came along..

Photography Wall Arrangement Inspiration

Here's a few simple tips for how it was done:

1) Choose your favorite photos. Get a basic idea of what sizes will be needed to fill the space. Record the quantity of horizontals, verticals, and squares (and your preferred sizes for each). Go with your gut and feature your absolute favorite photographs as the largest prints in your display to act as the focal points.

2) Shop for frames that suit the photographs and coordinate with one another - similar color family, texture, etc. Bring home a few extra frames to play with the options. (Note: Professional matting/framing is always recommended for your professional wall prints, but ready-made frames are great for small prints and snapshots. I just discovered these handmade frames and can't wait to order more for a few of my small photographs.)

3) Simply lay out the framed photos on the floor and move them around until they feel balanced.

4) Transfer the frame layout from the floor to the wall. Surprisingly, my client reported that they just eye-balled the layout without measuring a thing! It may seem too easy, but this is the key to give the look of a casual, organized yet random wall arrangement.

Photography Wall Arrangement Inspiration

Idea II: A Gallery Wrapped Canvas (in a unique place):

I was so intrigued to see this canvas hung inside this stylish family's buffet cabinet / hutch. It is so perfect and untraditional. It really inspired me to think outside the box for new ways and different areas that can be decorated with photographs. So many people express that they do not have any wall space, but that's when we can get really creative..

Gallery Wrapped Canvas Display Idea

For reference, the size of this canvas is 16" x 26."

It's such a treat to return to a client's home after some time has passed and see how they have displayed the photographs from our sessions together. Besides having total house envy, I am often so impressed with the finished result and how my photographs have been incorporated into their personal home decor. A huge thanks to my clients for allowing me to share their beautiful photography displays. I hope these examples and tips will help inspire ideas for incorporating your photographs (professional or personal) into your home decor. Have fun with it!

pinhole press photo books

Is it just me or does it seem like we are taking more and more photos every year and printing less and less? In film days, obtaining prints was an automatic byproduct of the process. It was so easy. Digital photography is amazing, but no doubt creates more time consuming challenges when it comes to keeping images organized and printed. I recently tackled a daunting project that I had been putting off for over a year. (It happens!) My goal was to combine our favorite photos from 5 years of living in California – 5 years worth of weekend trips and getaways exploring the west. For many, many months, even just the thought of the project would paralyze me and I’d choose to organize my closet instead.

When I stumbled upon Pinhole Press, I knew I had found my match. Pinhole's minimal design aesthetic and simple work flow solutions turned this overwhelming personal project into a breeze. Because I’m such a geek over a good photo book, I wanted to share these images. This is a 60-page Panoramic Book printed with recycled paper.

Pinhole Press Photo Book

Pinhole Press Photo Book

Pinhole Press Photo Book

Pinhole Press Photo Book

Pinhole Press Photo Book

Pinhole Press Photo Book

Pinhole Press Photo Book

Pinhole Press Photo Book

Pinhole Press Photo Book

Pinhole Press Photo Book

Pinhole Press Photo Book

Pinhole Press Photo Book

Pinhole Press Photo Book

Pinhole Press Photo Book

Can you imagine not having printed photographs of your current life and adventures to look back on, the way we flip through our parents’ and grandparents’ pictures? JPGs, hard drives, and discs may not last forever, but printed photographs will. If you have questions or need advice or encouragement to get started on a project, please email me or post a comment. I love helping people learn how to better organize digital photos and I completely understand how overwhelming it can become!

For the sake of full disclosure, I am a partner/affiliate with Pinhole Press, but only because I 100% love their products and use them for my personal photos.

Travel Photography Tips for the Minimalist Traveler | Bali Photographs

Whenever I travel to a new place, the desire to soak up every last detail with my camera is apparent. If you’re a photography enthusiast and planning an exciting trip near or far, I hope these few simple photo tips for traveling will help you prepare for an easy-going and memorable experience.

Goa Gajah Elephant Cave; Bali

Goa Gajah Elephant Cave; Bali

Kehen Temple; Bangli Regency, Bali

Kehen Temple; Bangli Regency, Bali

Gunung Kawi Temple, Bali

Gunung Kawi Temple, Bali

Basic Travel Photo Tips:  What to Pack & How to Prepare for your Trip

1) Pack Light & Keep it Simple

As a minimalist, I naturally travel light. My disclaimer is that I often pack too light. When in Bali, I underestimated the heat and… maybe wished to have had some fresh clothing options magically appear. My simple travel photo kit, however, was perfectly compact and lightweight - no regrets there!

I traveled to Bali with one full frame dSLR body and one prime lens (28mm 1.8). When traveling, I tend to shoot wide, and while this lens is not ideal for absolutely every situation; it was my best choice for a sharp, yet lightweight walk around lens. Simply put, I was going for comfort + quality and I didn't overthink the decision. I’m positive that my neck was much happier after a long day than it would have been with my much heavier 24-70mm L zoom lens.

Think about your shooting style, travel itinerary, and goals for your photos. Then, choose the best 1-2 lenses to compromise and maximize your priorities. Personally, I find that the least amount of lens choices I give myself, the easier it is to simply let go and enjoy my trip. With just one lens, the photos happen without any fret.

Bali Countryside & Rice Fields

Bali Countryside & Rice Fields

2) Be Prepared – Think “Extra”

Extra batteries are a no brainer and, of course, you’ll need your battery charger. Make a habit to charge your batteries every night. Extra memory cards are also a must. Refrain from the temptation to take one giant memory card. What happens if it gets lost or becomes corrupt? Split your travel photos between several smaller memory cards. Better to be safe… it is technology, after all.

You might even pack an extra camera - in the tiny point and shoot realm. There may be nights when you want to lock up your fancier gear and just take snapshots of dinner, nightlife, and friends with a point and shoot. Or, there may be long hikes on the agenda and you want to lighten your load and just take in your surroundings worry-free. It's also wise to have an alternative to handing someone your dSLR when you want a quick tourist photo taken.

A second camera is also a must for your clumsy counterparts to use worry-free. In our case, I watched in slow motion as my hubby slipped on a rock and our trusty little point and shoot camera took a dip in -of all things- Holy Water. Thankfully, we were able to retrieve our photos from the memory card, so we quickly moved on and devoted the rest of the trip to my dSLR. Lesson learned.. we'll always travel with a sacrificial point and shoot.

Bali Countryside and Rice Fields

3) Travel Smart & Choose the Right Camera Bag

Always bring your camera bag on the plane as a carry-on / personal item. I own a variety of Crumpler bags that I choose based on the smallest size I need for the trip. In my opinion, a camera bag is ideal if…

a) It doesn’t look like a camera bag, so you’ll be less of a target to theft. My Crumpler bag goes over my shoulder (across my body), closes with buckles, and falls to my hip, so I can keep my eyes (and a hand) on it. Avoid backpacks for this reason, as you’re making a pick-pocket’s job a lot easier. Trust me, I was pick-pocketed when I lived in Chicago while waiting for my turkey sandwich at Jimmy John’s (evidently their service is not always quite fast enough!) My purse was zipped and swung slightly to my back. The man did a shockingly fantastic job, as I didn’t feel a thing. Stay aware in all situations, especially in crowded places.

b) It doesn’t lean too far to the girly or manly spectrums, so my super nice husband can take it off my hands when I need a break - without cringing.

c) The designs are very simple and smart with adjustable inserts and inner zipped pouches to keep my camera gear + a few non-photography essentials secure in one place.

Bali Rice Fields

Bali Rice Fields

Bali Countryside & Rice Fields

Bali Countryside & Rice Fields

4) Back up your Digital Images

You might decide to bring a laptop or a portable external hard drive to back up your images throughout your trip, especially if you are embarking on a once in a lifetime experience. In Bali, I used a portable external hard drive to back up my images each night while I charged my batteries.

This gave me tremendous peace of mind during our busy days, knowing my important photographs were almost always in 2 different places. This way, in the worst case scenario of having your entire camera bag lost or stolen, AT LEAST your images are backed up in your hotel room or packed away in a separate bag, safe and sound. It’s definitely worth the little bit of extra effort.

(side note: As a minimalist, I opt for the portable external hard drive as it's a very small and inexpensive option compared to a laptop. The least amount of valuables to keep track of, the better.)

Bali Travel Photography
Tjampuhan Temple; Ubud, Bali

Tjampuhan Temple; Ubud, Bali

Travel Photography Checklist: • One dSLR camera w/ 1-2 lenses • One Point and Shoot • A Camera Bag like this Crumpler Bag (avoid backpacks and obvious camera bags) • 2+ Batteries • Battery Charger • Several Memory Cards (more than you think you need) • Water Resistant Memory Card Case • A Lens Cloth

Other suggestions: • A Small Tripod, like this Gorillapod • Rain Sleeves • A Laptop or portable External Hard Drive • A small Travel Journal (love moleskin journals) and a pen to record notes, thoughts, observations, and details along your journey

Alam Asmara Candi Dasa, Bali

Alam Asmara Candi Dasa, Bali

Alam Asmara Candi Dasa, Bali

Alam Asmara Candi Dasa, Bali

Candi Dasa East Bali

Candi Dasa East Bali

All Photographs Copyright Teri Genovese Photography

Above photographs of Balinese temples and landscapes were taken in Bali, Indonesia May 2011 Check out Bali Institute for an amazing cultural experience.